Intent : Secure VPN setup for bypassing firewalls. Not meant for setup of a virtual company network for secure exchange of information.
Step 1 : Setup a free tier AWS account. Can skip this step if an account is already setup. Login into your AWS account.
Step 2: Find a good location for your server. Your VPN server has to sit between the majority of the sites you access and you. For example, if you are in Asia and significant traffic is in US, HK and Tokyo make good choices. Take a look at the undersea cable map below to decide –

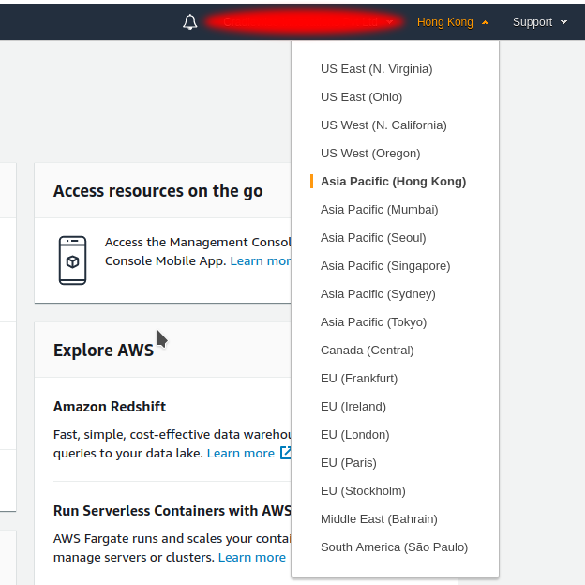
Step 3: Choose the region in the top right corner of your AWS console.
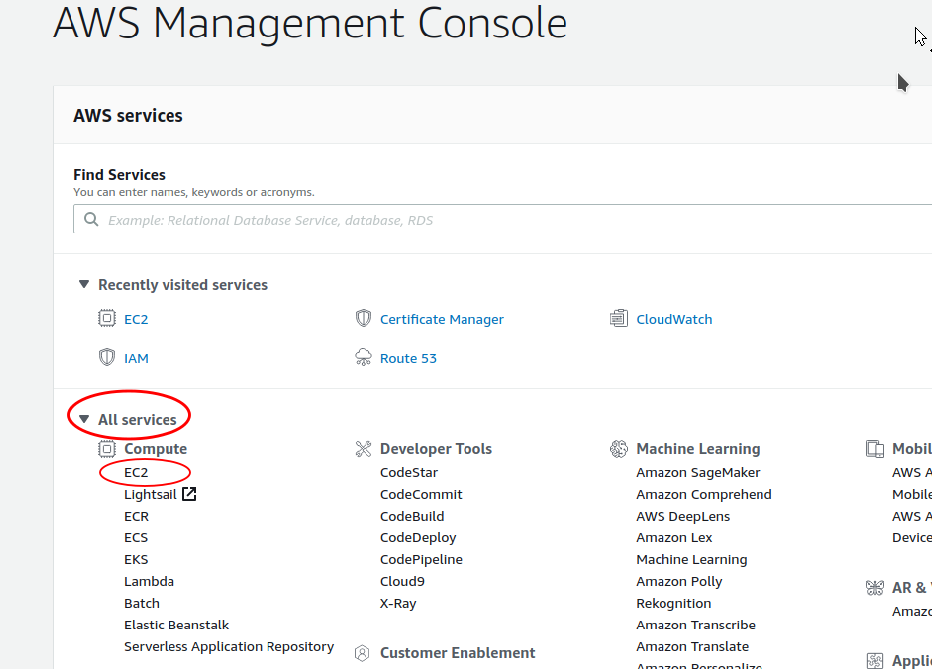
Step 4: Browse to EC2 service
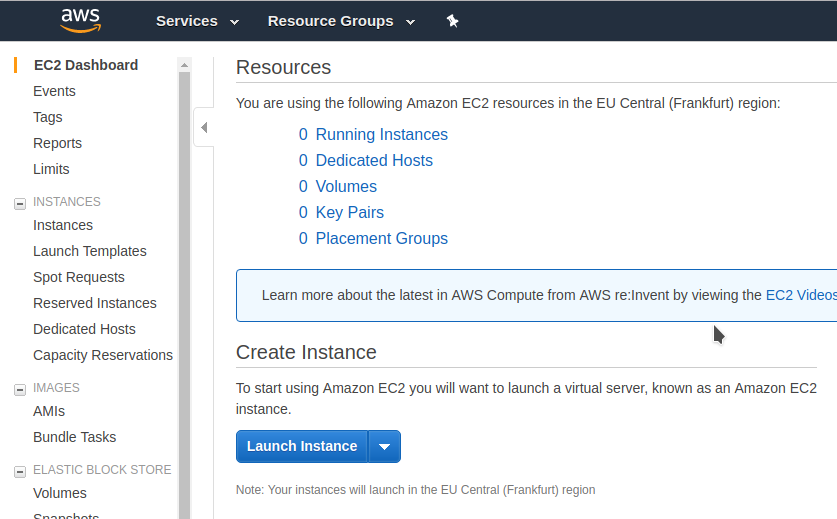
Step 5: Launch an EC2 instance.
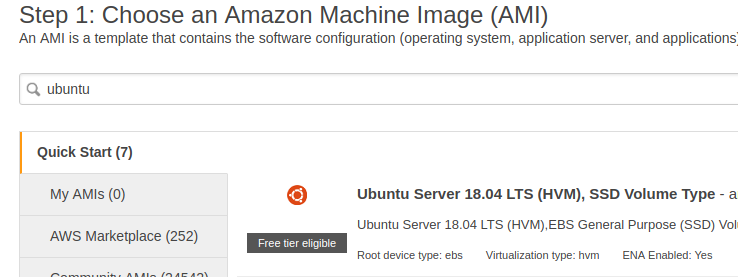
Step 6 : Search for ubuntu instance and choose the top result (64-bit, x86)
Step 7 : Launch the instance. You may be asked to create a key or choose one. If you are creating. Make sure you download the key and keep it safely. There is no other way of logging into the newly created instance if you don’t have the key. A couple of useful links are shown on the following page. If you are new to all of this, do check out the links to understand how to login into the instance.
Step 8: Login into the instance using the key.
Step 9: Download Algo VPN scripts from here . Or directly –
git clone https://github.com/trailofbits/algo.git
Step 10: Follow the steps prescribed here to install the dependencies, edit the user list in config.cfg and launch the script – https://github.com/trailofbits/algo
sudo apt-get update
sudo apt-get install python3-pip
sudo apt install -y python3-virtualenv
python3 -m virtualenv --python="$(command -v python3)" .env &&   source .env/bin/activate &&   python3 -m pip install -U pip virtualenv &&   python3 -m pip install -r requirements.txt
While running the script, two questions are important. The rest can be left to defaults.
What provider would you like to use?
11. Install to existing Ubuntu 18.04 or 19.04 server (Advanced)
And,
Enter the public IP address or domain name of your server: (IMPORTANT! This is used to verify the certificate).
Here, you have to enter the domain name as indicated on the EC2 console. Right click on the instance and click on “Connect” to find out the domain name. It should be something like – ec2-XX-XX-XX-XX.eu-central-1.compute.amazonaws.com
Step 11: Go to the EC2 console and edit the security group on AWS to make sure the required ports a open.
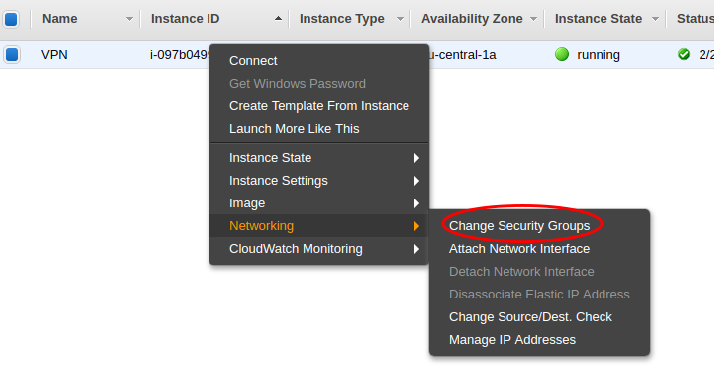
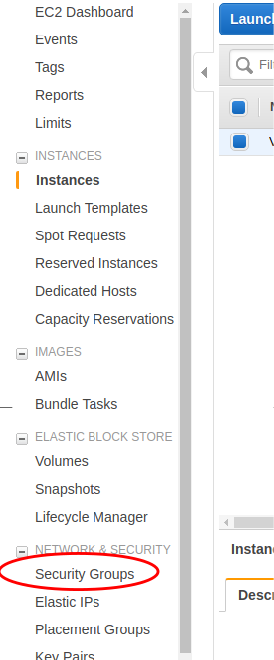
Note the name of the security group. Then go the security groups in the EC2 console.
Choose, the security group noted in the earlier step. Although not advised, just for simplicity sake, just open all ports from 1000 onwards for both TCP and UDP –

Step 12 : For client side setup, follow the instructions here.
Windows installer – https://download.wireguard.com/windows-client/wireguard-amd64-0.0.29.msi
You can locate the conf files and the PNG files for scanning in a subdirectory on the server –
/algo/configs/ec2-xx-xx-xx-xx.eu-central-1.compute.amazonaws.com/wireguard